✅✅✅How to Make Bubble Letters Step by Step?✅✅✅
- ✅✅✅How to Make Bubble Letters Step by Step?✅✅✅
- Create a second outline
- Add shadows
- Create a rounder letter
- Create a throw-up
- Change the color of your bubble letters
Most students learn how to do bubble letters by tracing around stick letters, but this is not the best way to get the desired expanded balloon look. There are a few steps you need to follow to get the look you’re looking for. You also don’t want to have to erase everything, add highlights, or erase the line before you’re finished. Instead, you should follow the steps outlined below. Hopefully, this information will help you create the typeface you want.
Create a second outline
The first step in creating bubble letters is to draw the outline. This will help them stand out. Once the outline is done, you can start filling the bubbles. You can use different colors, patterns, and styles to fill them. You can choose to fill them in Zebra print, Polka dots, Stripes, Hearts, Stars, Spirals, and Zig-Zag. To make them even more interesting, you can even add points to their tops.
To create a second outline, start by drawing the word or phrase that you want to use in your letter. Select the “shadow” tool and copy the layer a few times. You’ll have to move it over the original layer until it encloses the white one. You can erase the first outline if you want to change it later. This step will help you create a second outline for bubble letters that is more accurate.
To create bubble letters in Publisher, you can use the Squiggle tool. The Squiggle tool is the squiggly line at the end of the “Lines” section. Hold the left mouse button down as you type in the letters. After typing the first letter, you should see a bubble outline appear. Repeat the process with the other letters. Then, click the “Create Second Outline” button on the ribbon and drag it to the new outline.
To create an outline, select the text that you wish to outline. Once you’ve selected the text, click on the “Text Effects and Typography” tool. It’s located in the Font panel at the top of Word. Click on the “Home” tab. Next, select the color and weight of the outline. Once you’re happy with the color of the outline, click the “Save” button and the outlines will be saved.
Add shadows
 Adding shadows to your lettering is easy and can help give your lettering more depth. To begin, duplicate each word in the image. Next, use the two-finger right-swipe gesture or tap the layer to lock it. The locked layer will display a grey and white checkerboard pattern. Don’t add any additional art to locked layers! This step is optional, but can improve workflow.
The first step to add shadows to your bubble letters is to choose a color to use as a base. Typically, this will be the lightest shade of the color you want. For example, orange is a great choice for a base color. You will then paint the shadows with the medium or darkest shade of the same color. When you’re finished, you’ll have a letter that has a unique, beautiful shadow.
Once you’ve chosen the colors and chosen a paper, you can add shadows to your bubble letters. For best results, you should use thick paper and eraseable pencils. Adding a dark outline is also recommended, as it will help the letters stand out and create more contrast. Make sure to erase all pencil marks after each bubble letter. Then, apply your final touch with the dark outline. You can use your bubble letters to create a layered effect.
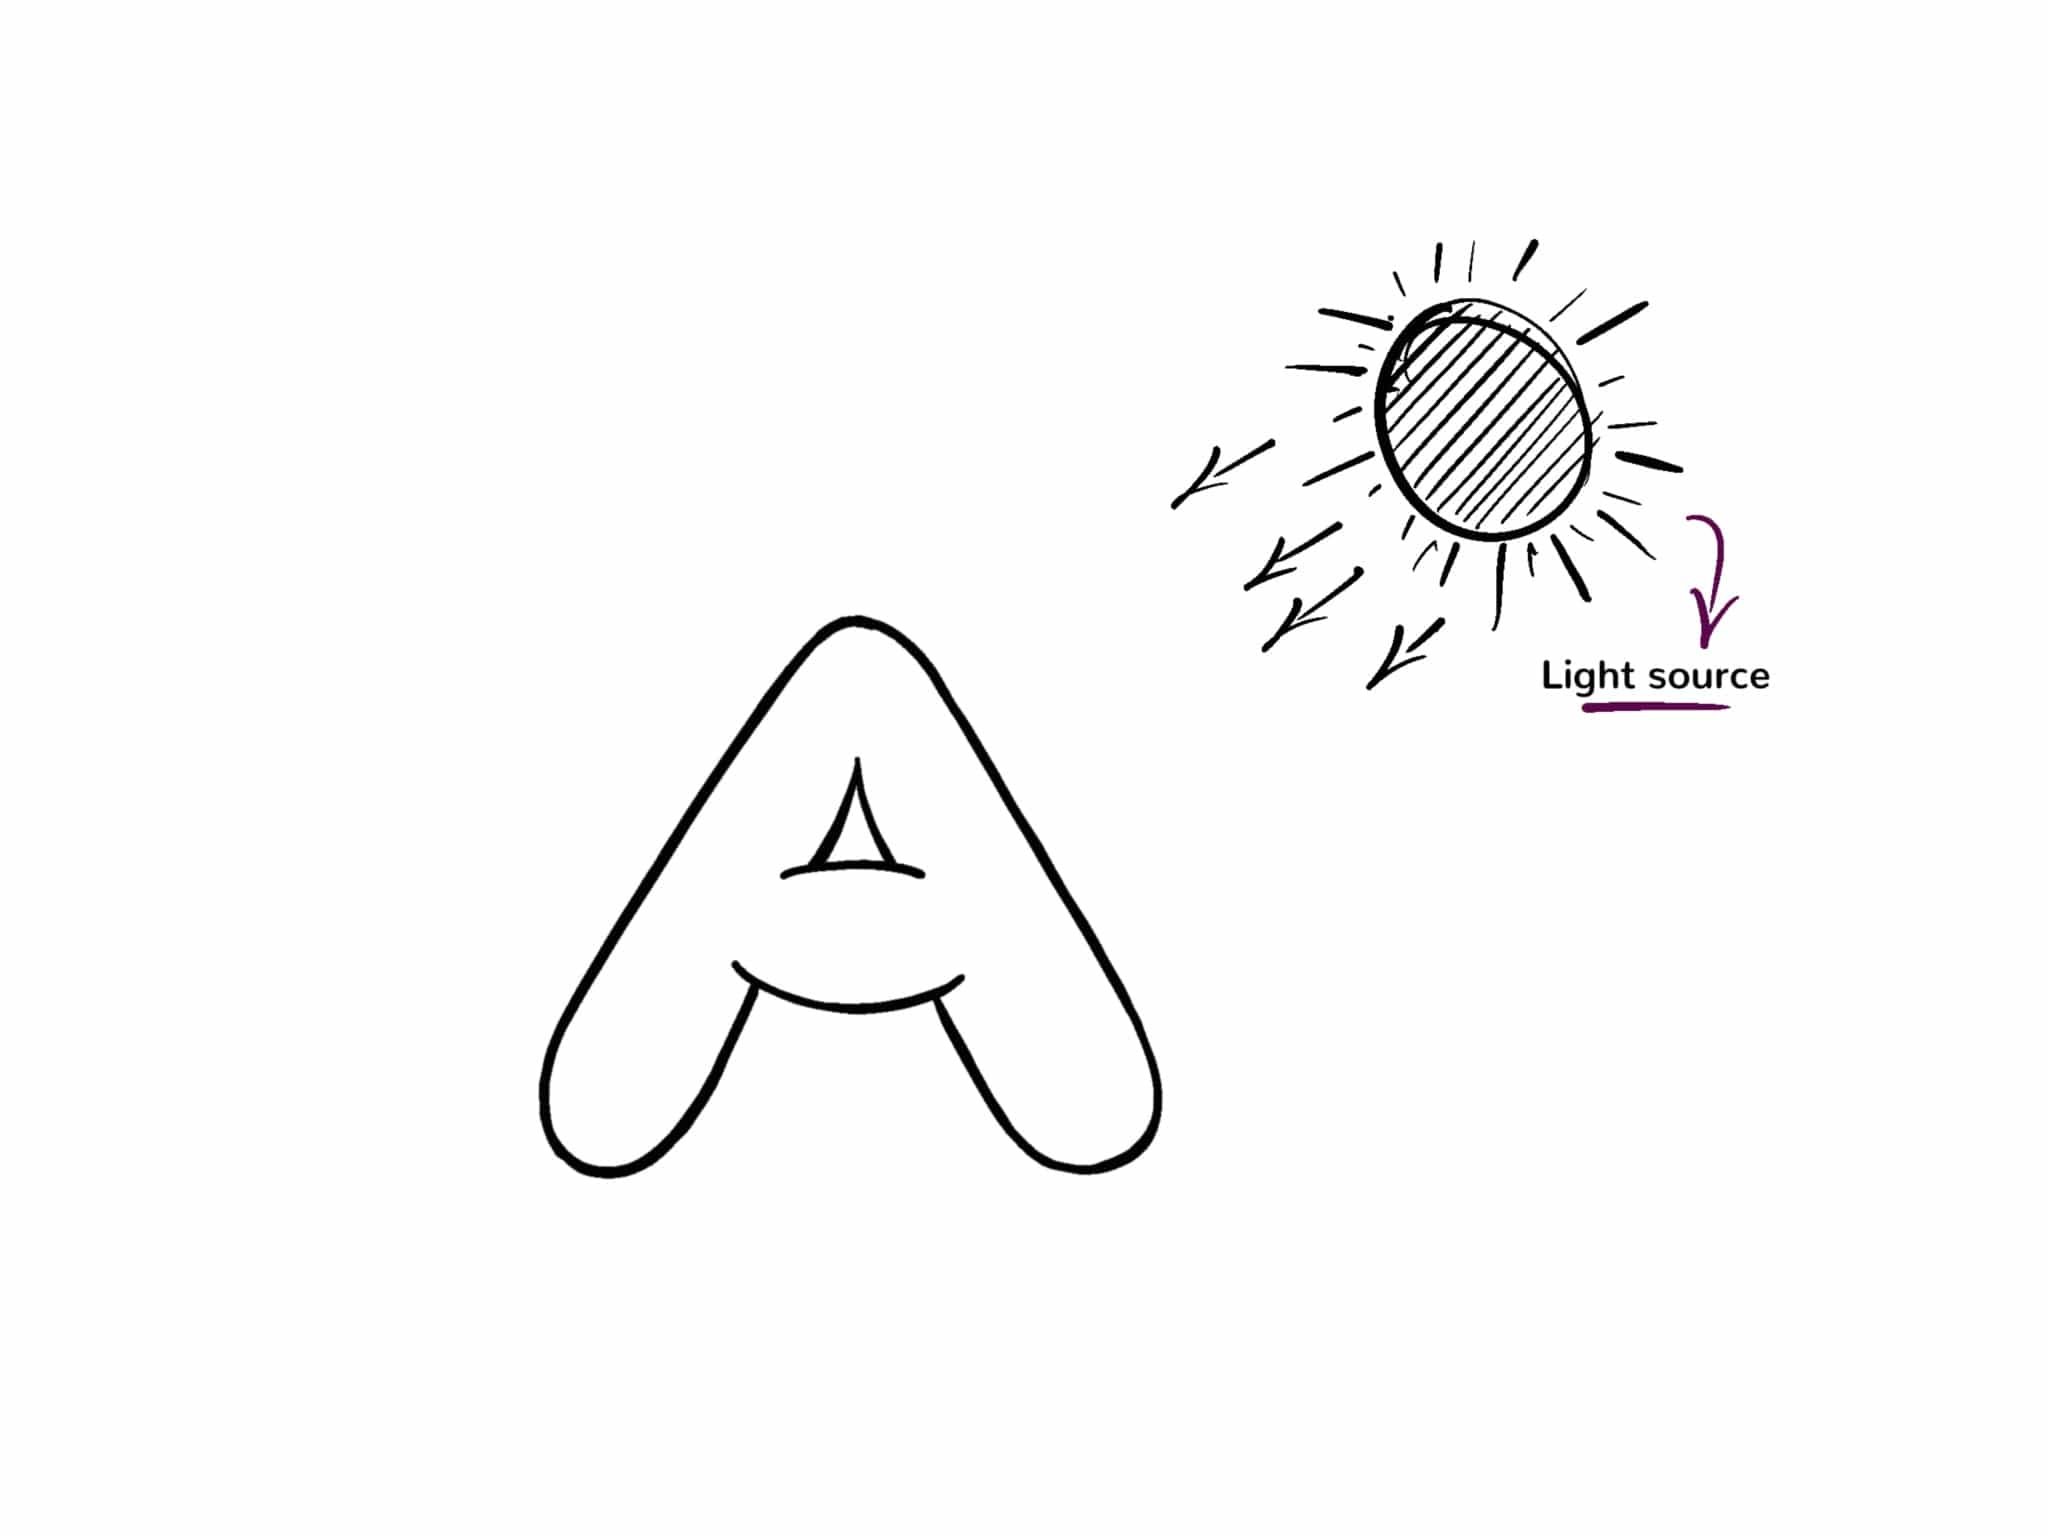
A dark shadow creates a stunning three-dimensional effect. This technique is effective for adding shadows to any letter, from small to large. You can add a dark shadow by using a black or gray brush pen. This method will work for monochromatic lettering as well. In this technique, the light source will be at the top of the image, so the shadow will be darker at the bottom. When done correctly, it will give your letters a 3D effect and make them look more attractive to the eye.
Create a rounder letter
How to create a rounder bubble letter? There are some key differences between a rounded bubble letter and one with a straight back. The former has a slanted curve, while the latter’s curve is straight. While both bubble letters are easily recognisable, the former’s curve has a larger radius than the latter. The following are the tips to make your bubble letter look more natural.
First, you need to draw the basic shape of the letter. This could be lowercase or capital. Next, draw a rounded oval or circle outline around it. For curved letters, make sure to include an oblong circle or triangle inside the opening. Once you are satisfied with your initial sketch, add color and highlights to the bubble letter. As you go along, you’ll notice that the final product looks much better.
Next, make sure the circle is not too small. To make the bubble letters appear larger, you can add a small space to the edge of the letter. Also, you can draw it in lowercase or uppercase. After that, “insulate” the lines of the letter. When you’re done, you’ll have an elongated bubble letter that looks more natural. Once you’ve done this, you’ll be amazed at the results.
The most important step in creating a bubble letter is practice. Practice on artist trading cards and other paper will help you become better at it. After a few days or weeks, you’ll have a perfectly rounded bubble letter. If you want your bubble letters to be more unique, try creating them using a thicker paper. Using thicker paper will help support the design and allow you to erase interior lines more easily.
Create a throw-up
You can create a beautiful throw-up letter with simple lines and color. You can use extra outline colors and your own additions to create the perfect throwie. Make sure to align the bottom left and top right corners of your letters. Then, use a light blue 3D shading, a gray gap between the inner and outer edges, and curved lines to create a bubble letter. Now, you can use this design to create a throwie alphabet, or even a name!
Next, create your outline. This is very important for the throwie. You need to make the letters smashed together with an internal hole or line. This will make your throwie jump off the page! To make it even more impressive, you can use a different color for the fill and outline. Once your throwie is complete, you can paint it! You can use different colors for different elements.
As you can see, throwups and tags are similar, but have more work involved. Throw-ups are graffiti-like drawings of bubble letters. The letters are used to execute graffiti words quickly, and generally include the artist’s name and two colors. There is more to this style than just tags and throwups. If you’re looking for a fun way to get creative, throw up a graffiti-like letter and start experimenting.
Another easy way to add some color to your letter is to write it in a different style. You can do this by using two or three colors, overlapping the letters. You can also incorporate characters or a few other symbols into your throw-up letter. Characters or symbols work well with letters like o or e. Lastly, throwup letters can be an effective way to add fun and color to your text.
Change the color of your bubble letters
 If you’re a graphic designer, you probably already know that Illustrator is an excellent vector graphics application. These programs are often used by graphic artists to create and modify designs. When using a vector graphic, lettering has to stand out. Using bubble letters is a great way to do just that. The cube on the toolbar allows you to adjust the color and size of each individual bubble letter. You can preview the effect of your bubble letters before saving your work.
To change the color of your bubble letters, simply go to your iPhone’s settings and tap on “Customize conversation.” You can then adjust transparency and three other options. In addition to this, you can also change the font color. The colors of the bubble letters are not permanent; they have a specific meaning. For example, green is used for SMS, whereas blue is used for iMessage. You can also customize the color by tapping on the t icon.
When creating your letter in photoshop, you can add shading to the individual letters by drawing the shapes of light on top or behind them. When using this tool, you should follow the instructions for each step. If you do not understand the instructions, you can always redraw the entire letter with a pencil. After shading, you’ll have a letter that’s both round and realistic. You can also learn about cast shadows and depth using photoshop.
The bubble mixture can be used to create a variety of colors. You can mix different types of colorants into it to achieve a variety of effects. Red food coloring, pure beat juice, and red paint are a good example of what you can use. If you want to make red bubbles, you’ll need a medicine dropper to transfer the colorant. You’ll need equal amounts of each colorant in each cup.
We look forward to your comments and stars under the topic. We thank you 🙂